
How To Use A Knee Scooter Properly (An Illustrated Guide)

- Edd Siu
January 20, 2020 Updated: June 17, 2020
- A knee scooter, or knee walker, is a medical recovery aid device used to provide relief for any below the knee injuries. They are a modern-day alternative to crutches, canes, and regular walkers. These devices allow you to move freely and with comfort, because let's be real, nobody can just sit at home all the time while waiting to recover from an injury.
You still need the freedom to go out, work, and enjoy all your usual activities.How to Properly Use Your Knee Scooter
In this guide, we'll go over step-by-step on how to properly use a knee scooter.
- 1. Size your knee scooter properly
- 2. Lock the brakes
3. Bring hands to handlebars - 4. Mount knee scooter
- 5. Ensure stability
- 6. Unlock the brakes
- 7. Propel yourself forward
- 8. Use brakes control your speed
- 9. Make proper turns
- 10. Dismount scooter safely
- 11. Follow basic safety tips
1. Size Your Knee Scooter Properly
Properly sizing and adjusting your knee scooter will be essential so that you can use the scooter safely and optimize for comfort. Avoid riding the knee walker without measuring first; you don't want another injury on your plate!
The two main things that need to be adjusted are the height of the knee rest and the handlebars. The correct knee pad and steering column height will vary for each person.
Additionally, some knee scooter models will allow you to adjust the orientation of the knee pad to support your left or right foot properly.For this process, you will need a:• Tape measure or a yardstick.
• Friend or family member to lend a hand (not necessary but recommended)
• Stable item to hold on to like a chair, counter, or wall.
1.a Ensure Proper Knee Pad Orientation
Some knee pads can be adjusted to better support your left or right leg. It helps the knee scooter be more ergonomic—providing your injured leg with better resting comfort. Additionally, it will help your good foot make strides with a lot more ease and prevent your foot from hitting the side of the scooter frame.
 Knee rest pad setup to accommodate a right injured foot.
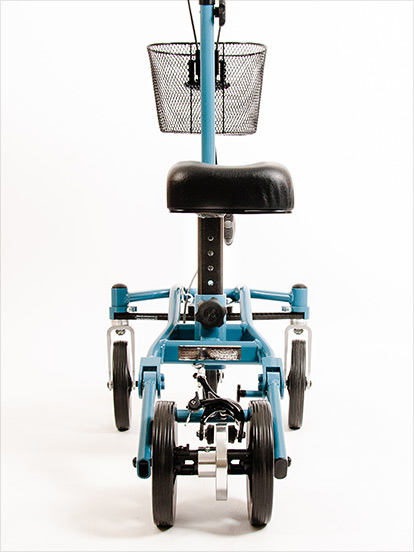 Knee rest pad setup to accommodate a left injured foot.
First, find out if the scooter model requires proper knee pad orientation; refer to the user manual. If it does not, then skip this step.
Unlock the knee rest and take the entire knee rest post off the mainframe. Instructions are usually found underneath the knee rest; if not, refer to the user manual.
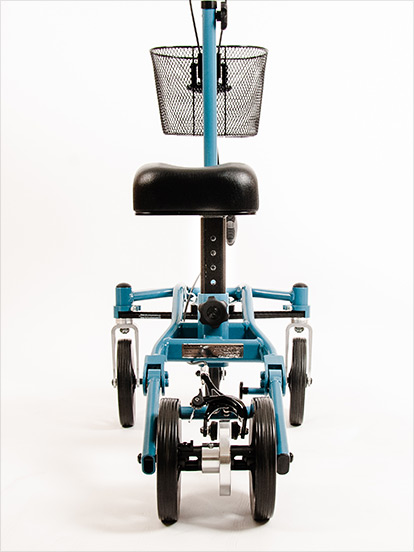
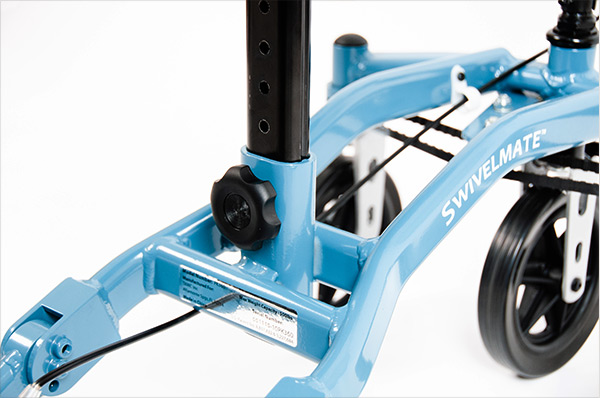
We'll be using Swivelmate Knee Walker by TKWC for this demonstration. It's a great feature-rich knee walker with unique turning-capabilities to help navigate through tight spaces and around obstacles.
 The Swivelmate knee scooter by TKWC
On this scooter model, the proper orientation labels are located underneath the knee rest. Adjust the orientation as needed.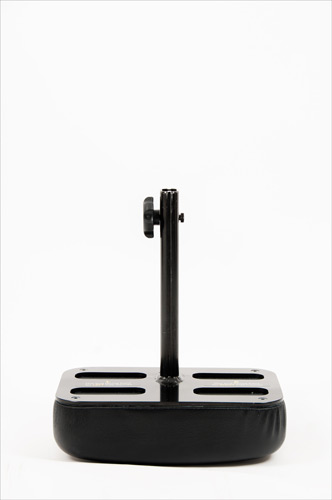 Some knee scooters require proper knee rest orientation.
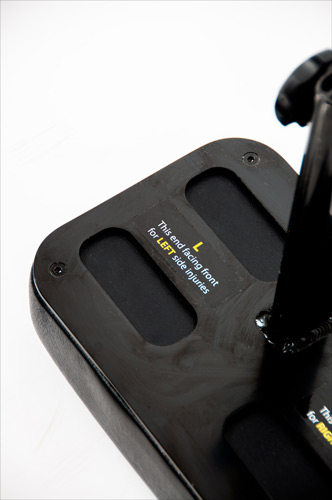 This is the knee rest for the Swivelmateknee walker.
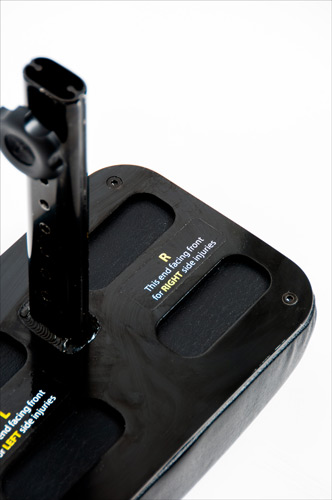 Proper orientation ensures extra comfort to support your injured leg and overall use.
1.b Adjust Knee Rest Height
First, stand up straight while holding onto a stable item. Next, bend your injured knee 90 degrees. Measure the distance from the bottom of your bent knee to the floor. See below:
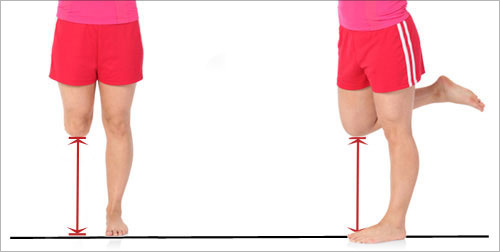
After you've taken note of the distance between your knee and the floor, adjust the height of the knee pad to match the same distance. It should be equal in height from the surface of the knee pad to the floor.
Follow your knee scooter user manual to properly raise or lower the knee pad post and securely lock it into position.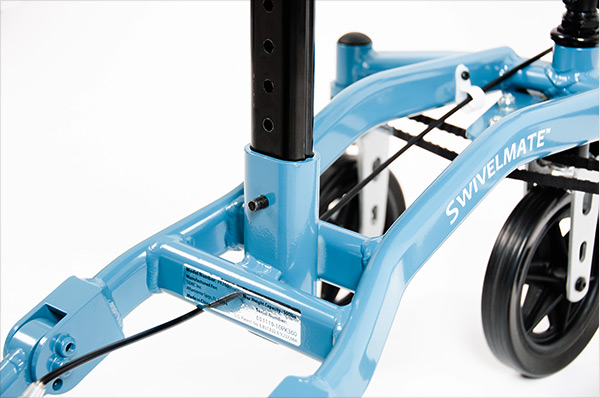
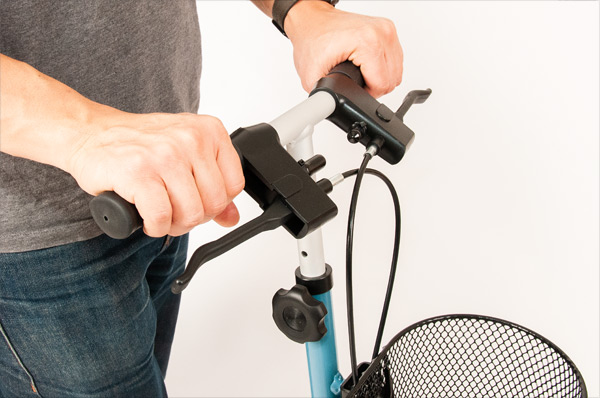
1.c Adjust the Handlebars
The proper handlebar height should be about the same height as your waist. Unlock the handlebar height adjustment knob and set the height accordingly. Refer to your knee walker's user manual for proper locking and unlocking instructions.
On the Swivelmate, the process is as shown below: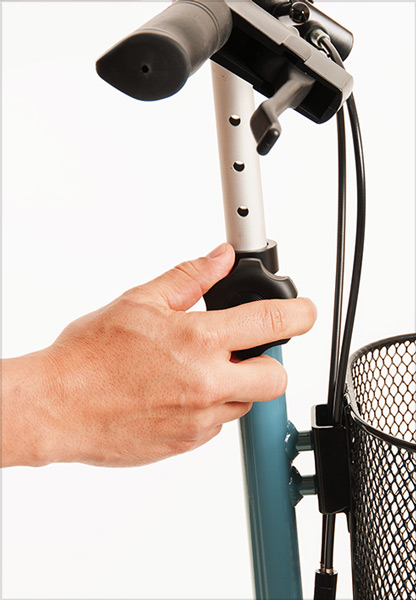 Untighten the adjustment knob.
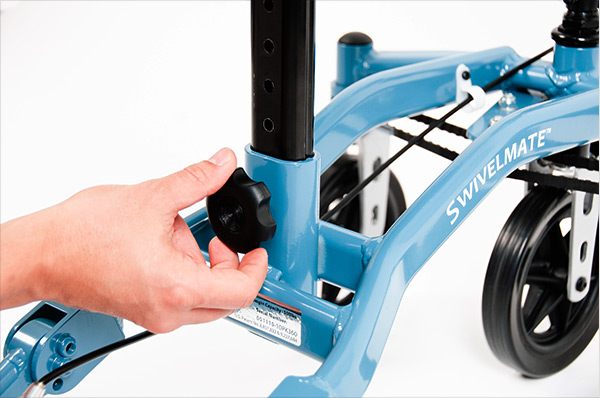
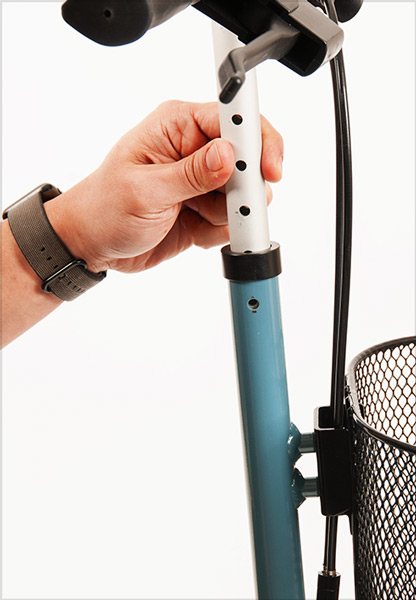 Remove the locking pin and raise the steering rod to the desired height.
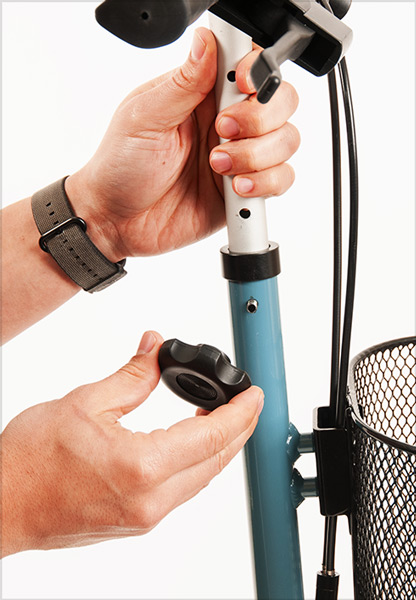 Reinsert the locking pin.
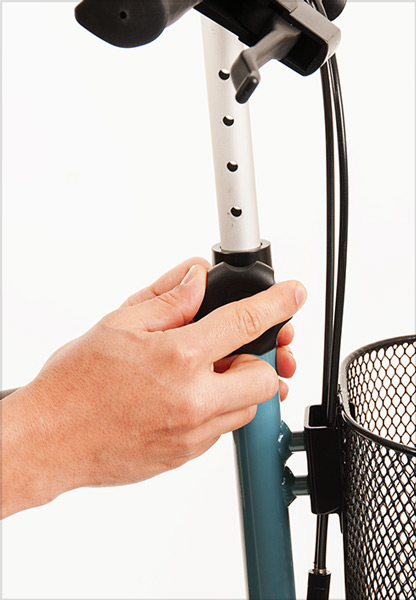 Tighten the adjustment knob,
making sure it's finger tight.
Now that you've set these necessary adjustments, now it's time to mount!
RELATED: Do I Need A Knee Walker Basket?2. Lock the Brakes
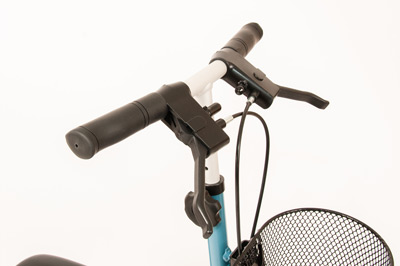
Before you get on your knee walker, you must engage and lock the brakes. Locking them is essential, primarily when first getting used to the scooter. It provides stability and prevents the scooter from rolling away.
Locking mechanisms are different on each model; refer to your model's user manual on how to lock the brakes.
On the Swivelmate, you push outwards on both brake handles to lock them. They are the easiest and most convenient locking mechanism we have used by far.
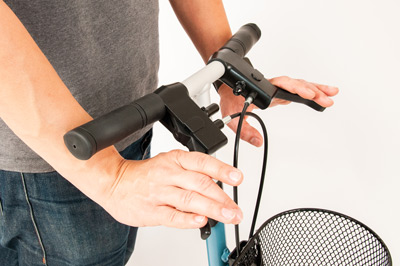
Now, we know the scooter is stable.3. Bring Your Hands to the Handlebars
Stand next to the knee scooter, with your injured leg next to it.
Grab onto both the handlebars before you "step-on' your knee walker. Doing so assures that the model is stable and provides you with something to hold securely.
 Bring your hands to the handlebars with the locks engaged.
4. Mount the Knee Scooter
While still grabbing onto the handlebars, mount your injured leg to the knee rest—while keeping your uninjured leg on the ground beside the knee walker.
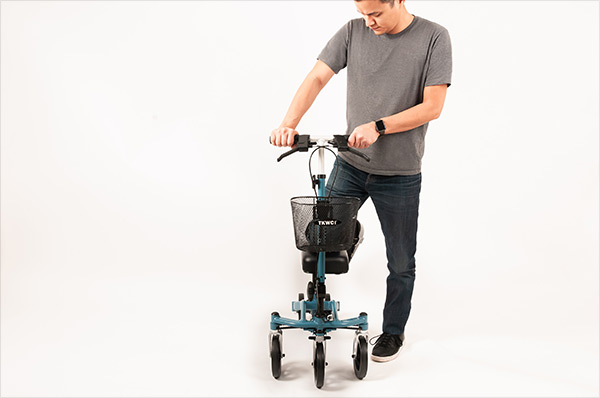 Mount the knee walker.
Great! Now that you've mounted your knee scooter, let's do a quick stability check.5. Ensure Stability
You should be standing with your posture upright and comfortably on your good leg. You should not hunch over the unit.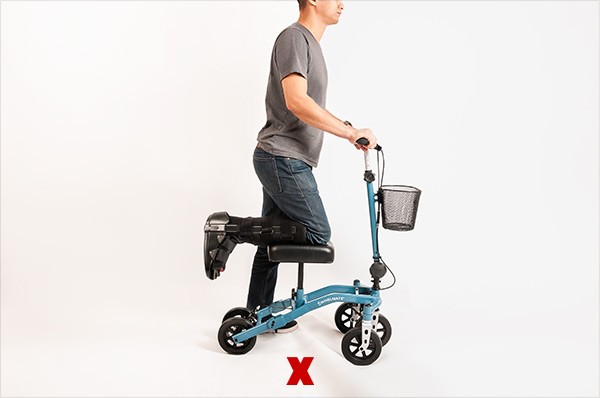 Incorrect hunched over posture.
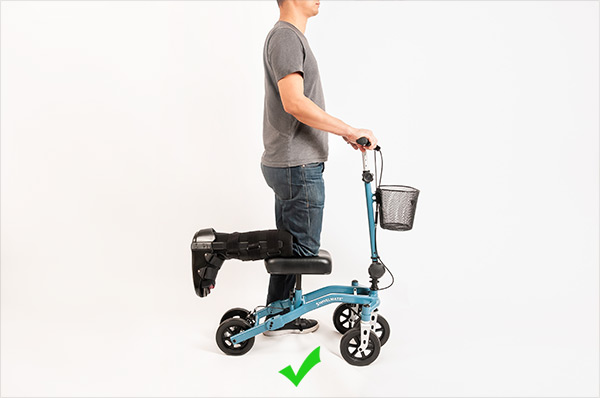 Proper upright posture.
Your injured leg should be resting on the knee pad at a 90-degree angle, and your hips should be even. Make any necessary adjustments to the knee rest height if needed.
 Your injured leg should be resting comfortably bent at a 90 degree angle.
The handlebars should be set at a comfortable height in front of your body at about waist height. Proper handlebar height should be set at your waist level.
Keep in mind that if you decide to add a knee pad cushion, you will need to adjust the knee rest height to compensate for the extra padding.
Related: Best Knee Scooter Knee Pad Covers6. Unlock the Brakes
Okay, now that we've done our stability check, you're ready to take your first stride. Before you do, go ahead and unlock the brakes.
On our model, it's a matter of simply pulling back the brake handles.
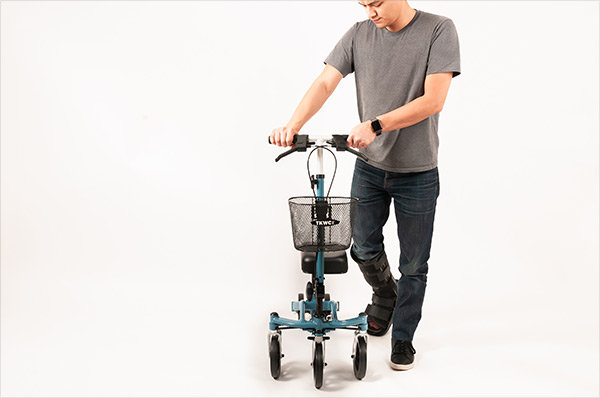
7. Propel Yourself Forward
Now that you've fitted your knee scooter properly, you're stable on the unit, and your brakes are off; you are ready to take your first stride.
Make sure you're doing this step away from anything that can break, tip over (like next to a shelf with glass), or an uneven, bumpy surface.
With both your hands holding the handlebars, use your good foot to push yourself forward. Start with a small stride first. You want to get a feel for the scooter—get to know each other! Pushing yourself to go too fast could result in the scooter tipping over and going down with it.
Always keep both hands on the handlebar when riding.
 Start with a small stride first and work your way up to a normal walking speed.
8. Use Brakes to Control your Speed
When using a knee scooter, you want to always move at a controlled speed. Use the hand brakes to slow and control your current pace along with applying weight with your good foot to come full stop.
Just like the brakes on a car, every model is different. Some are touchier than others. Make sure you are comfortable with your braking mechanism before relying on it to slow down.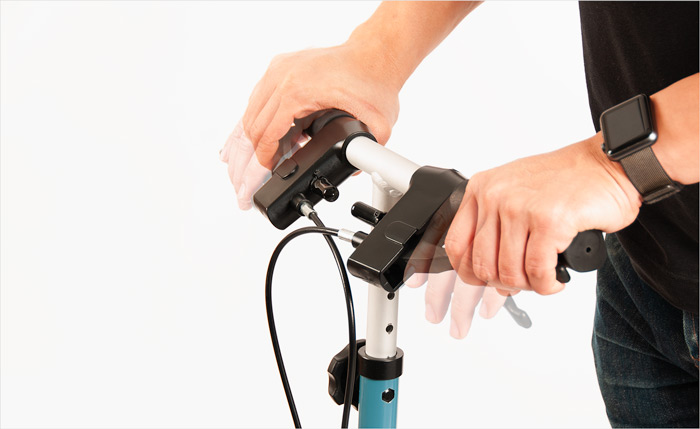 Always use the brakes to be in control of your speed.
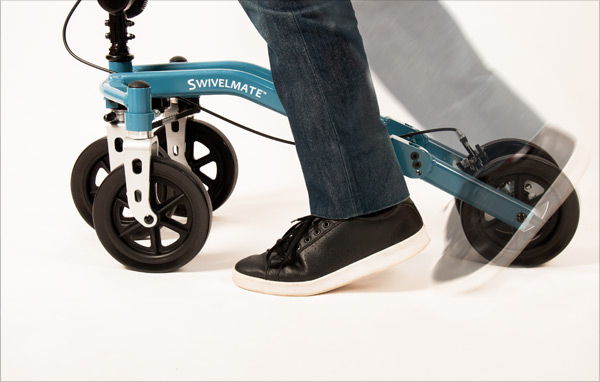
9. Make Proper Turns
Turn the handlebars to guide the wheels into the direction you would like to go. Take note of your model's turning capabilities. Most models can turn 40-45 degrees. Depending on how tight the corners are, you might need to do a three-point-turn (we hope you remember this from driver's ed.) With practice, this will become more natural.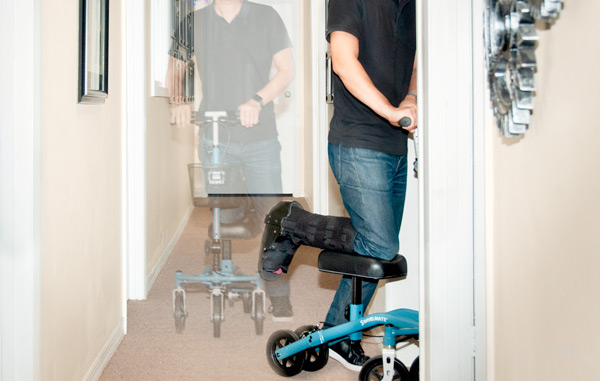 Always slow down before making a turn.
The Swivelmate knee walker we are using here has a unique ability to make 90-degree turns. Tight corners are a breeze.10. Dismount Knee Scooter Safely
When you get to your destination, dismounting your knee walker is just like getting on.
Always come to a complete stop before getting off. Remember, use your handbrakes to slow down, then brake with your good foot to come to a complete stop.
Once stopped, lock the brakes so that the knee walker remains stationary. Keep your hands on the handlebar while coming off the unit.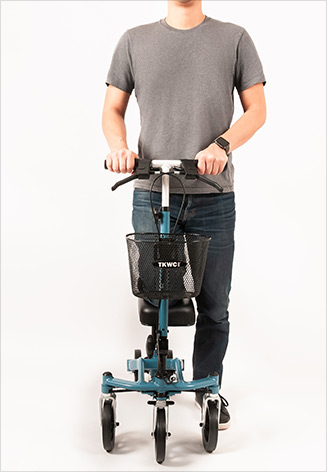 Always lock the knee scooter before unmounting.
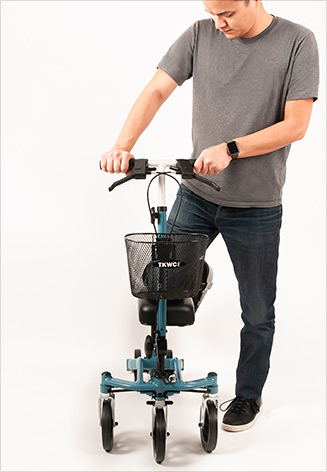 Support your good food on a leveled and stable surface.
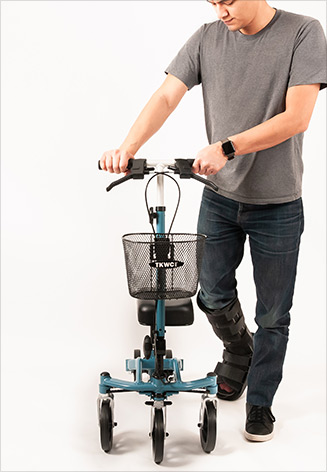 Gently move your injured foot away from the knee rest.
11. Follow Basic Safety Tips
While knee walkers are said to reduce reinjury more than other assistive devices, that does not mean they do not carry risk. So it's important not to abuse its capabilities.
Here are a few basic safety tips:
On to Recovery!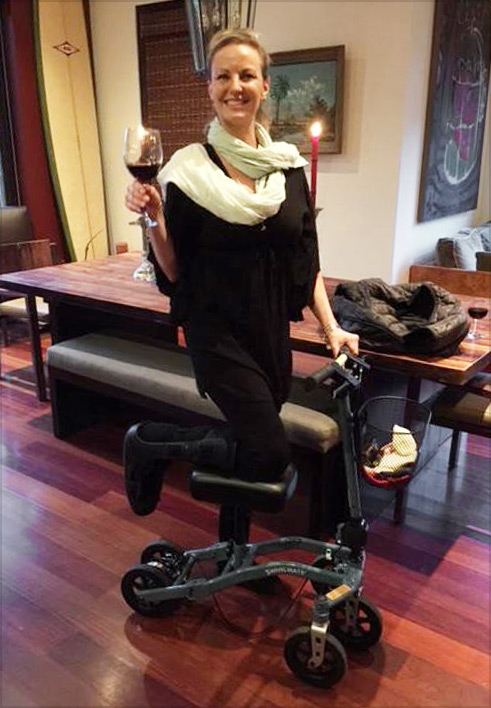

Janelle - Los Angeles, CA Christine - Concord Township, OH Christine - Concord, OH Once you've mastered how to operate your knee scooter, you can now spend your time focusing on your recovery. With the help of a knee walker you should now be able to resume most (if not all) of your regular activities.
We find many customers are able to return back to work, do household chores and even go on vacation!
Ready for a Knee Walker? I want to... I want to... orChoose this if you'll need it for
6 weeks or lessChoose this if you'll need it for
more than 6 weeksI already have a knee walker - 1. Size your knee scooter properly
More Great Rent A Knee Walker News & Stories
- •
- •
- •
- •
- •
